How to Implement Kanban Cards
Kanban is a popular and powerful workflow visualization tool, and one of its main selling points is its simplicity. While the design of your Kanban system is important, one crucial factor that sometimes doesn’t get the attention it deserves, are the actual Kanban cards.
When you look at the Japanese meaning of the word Kanban, you’ll find out that it means either card or visual signal. This means that the cards are the actual namesake of this tool, which contains all the relevant information about what to do next. This is different than a kanban board, used to manage tasks in a project or office setting using sticky notes.
What Is a Kanban Card?
Kanban cards are a visual signal used to communicate that action is needed. When you encounter a card in your process, it means some action is needed to take place. On the card is written specific instructions about what to do. If the actions are completed, then the process continues to operate correctly. If the card is ignored, then problems arise over time.
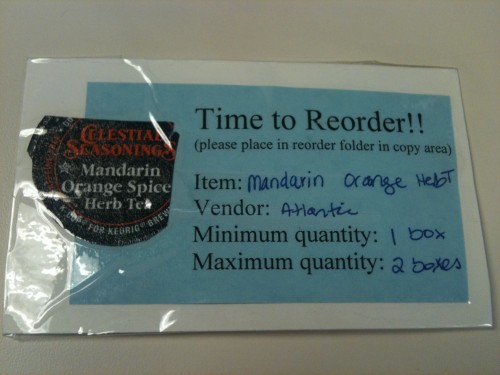
Here is a good example of a simple kanban card system. At the Lean Enterprise Institute offices, they have a supply cabinet for tea. When the tea runs low, a card signals that more tea needs to be ordered. The card contains the relevant information to re-order more. There is enough time between the last box of tea and how long it takes to re-order more, so that they never run.
Read the entire example of kanban used for office tea boxes on Mark Graban’s blog >>>
The Standard Key Features of a Kanban Card
As mentioned above, the most important job of the Kanban card is to make vital information easily accessible. It needs to be visual and easily comprehensible, so the team members that look at it would be able to infer as much of the data it represents at a single glance. On top of this, it should include additional details, so important information will be readily available to everybody.
The Front Side of the Kanban Card
The front side of the Kanban card is what everybody sees at first glance, so it needs to include the most crucial information. It needs to communicate what’s essential without being cluttered. This can also be done through color coding, where each card color represents a different task or responsible person.
The first thing that the card cannot go without is a name of the task or activity it represents, such as “Call customer and request shipping approval”
Additionally, it usually includes the name or names of people responsible for it, and how long they have to complete the task. It might also include the batch size to perform the task (such as “group of 3” but ideally all tasks are done one at a time).
If the cards are part of re-ordering items, it might include part numbers, cost centers, ID numbers, location/department, supplier name, customer name, number of cards in the system, etc. These should be the most relevant information for the person needing to take an action.
The Back Side of the Kanban Card
While the front side of the card needs to make vital information readily available, the back side might include things that are important that don’t need to be visible at all times. Very often the flip side of a Kanban card is reserved for more detailed instructions, if the front of the card isn’t sufficient. It might reference a procedure number, a checklist of tasks to complete, a contact person to ask if there are questions, or any other information that doesn’t fit on the front of the card. Not all kanban cards have information on the back, so this is optional.
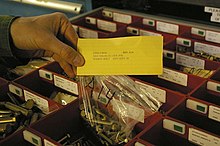
Here is an example of a kanban card used to signal that more left-handed smoke-shifters need to be re-ordered from Acme.

Want to learn more about kanban cards? Check out an introductory video from Gemba Academy >>>


No responses / comments so far.